Well, it’s Halloween season. All of the stores are filled with costume and costume accessories for pretty cheap (not as cheap as they will be Nov. 1st of course). Most of the off the shelf Star Wars items are a geared more towards younglings, but every now and then I find a few items that, with a little help, can be very passable props.
Over the next week or so, I’m going to be converting one such item to be as screen accurate as possible. Today we are going to take a look at the prop, what needs to be done to it, and alternate version of what I have done with this prop in the past.
With that all said, let me introduce you to the prop:
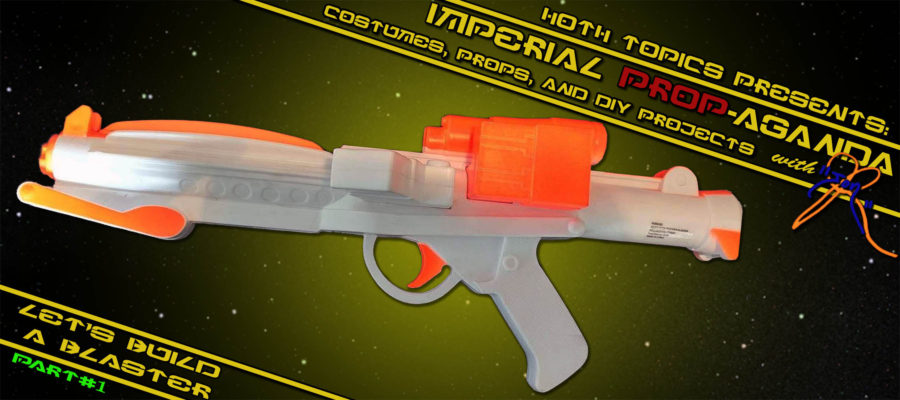
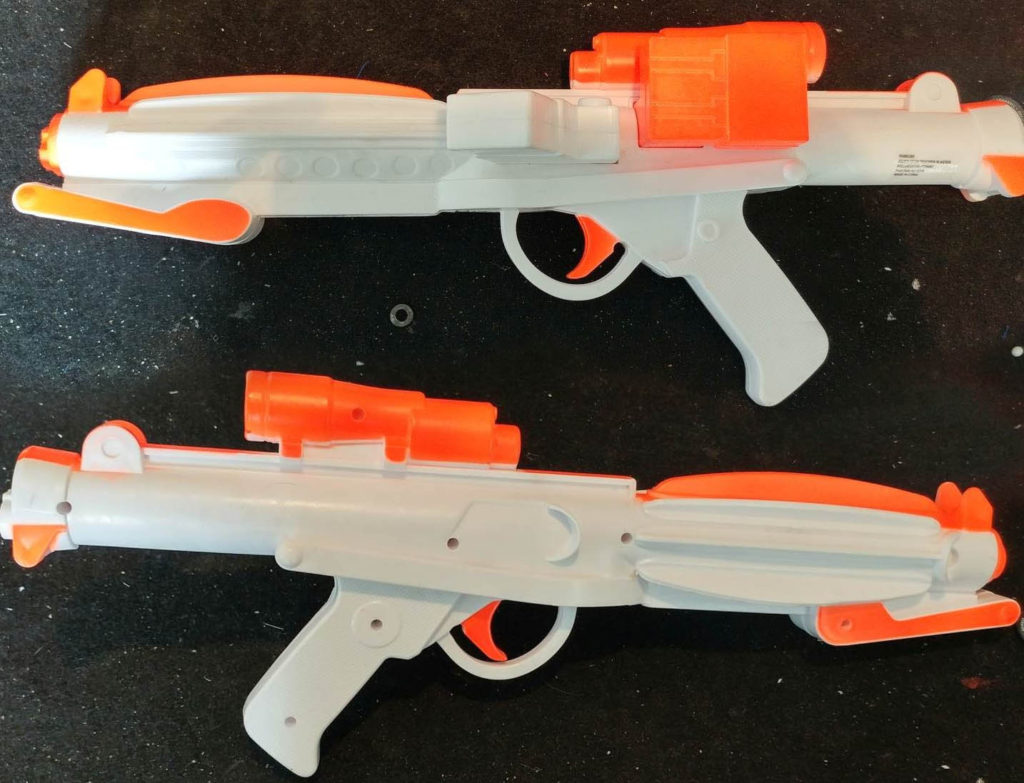
The Rubies “Star Wars Storm Trooper Blaster Halloween Costume Accessory” (official Wal-Mart name)
I love these little blasters they cost about $12USD and as far as toy replicas available on the market, I don’t think there is anything that matches these blasters for ‘screen accuracy’ without considerable work and cost (see below for the Hasbro Blaster comparison photos). They are however scaled more to children. This blaster is based on the the ones the Stormies use in the Rebels TV show. The main difference is that the fins on the barrel (aka T-Tracks) are arched. Not too big of a deal, right? They also seem to be about an inch shorter on all sides, but painted up your can’t really tell. That being said, if you want something that would pass as an actual prop, you do need to put a bit of work into it.
What needs to be done?
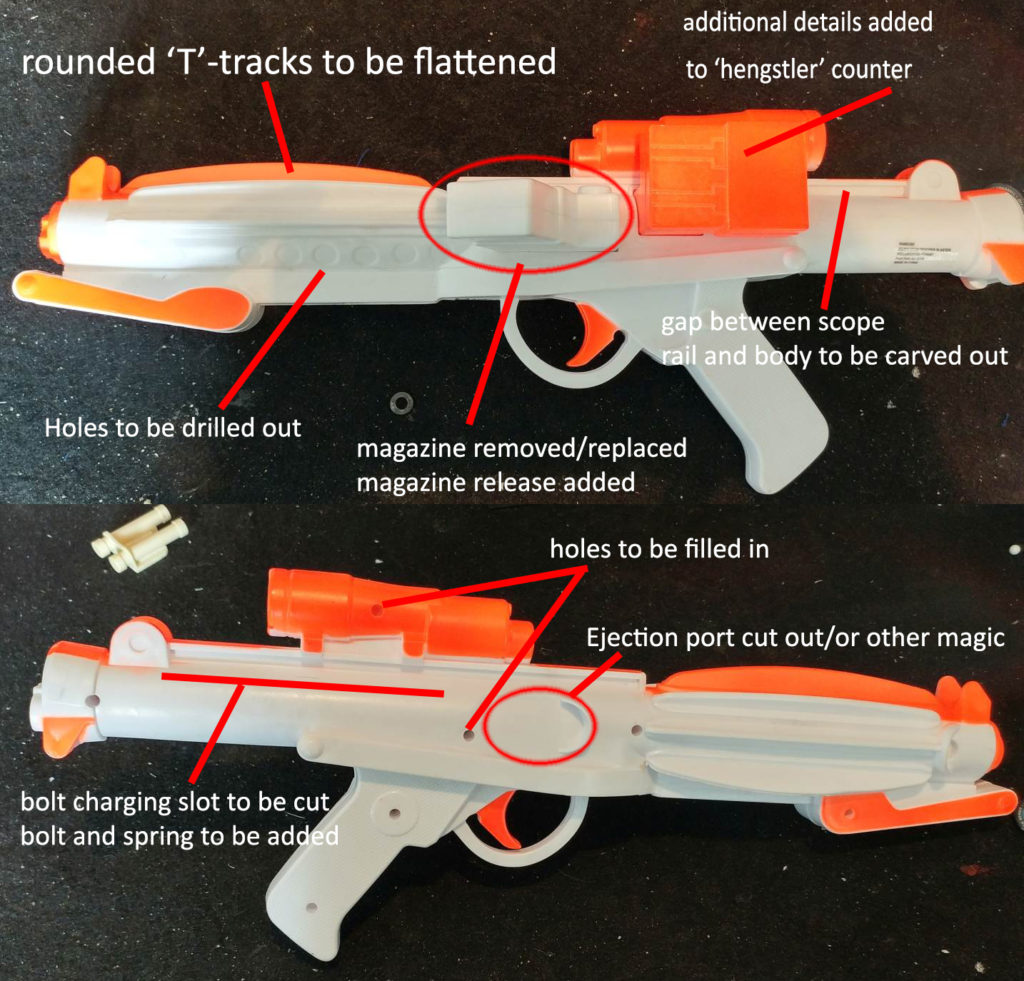
It looks like a lot a work, but for the most part, it can all be taken care of with a rotary tool (with a cutting disc and sanding drum), a sharp hobby knife and some super glue.
How does it compare to whats on the market?
This blaster doesn’t hold a candle to the licensed prop replicas out there. You know, the $200 plus ones, some made of injection foam rubber or resin kits. We aren’t talking about those today. A sub $15 blaster doesn’t compare to those ones. But if you’re not trying to get 501st approved right away and maybe just need some back ups for a film project or a one off Con or Halloween costume. This is going to work wonders.
Hasbro E-11
Because I am super professional, I had completely forgot that the only thing ‘on the market’ that compares to this blaster… isn’t sold anymore at retail. The Hasbro electronic blaster is a staple of costuming.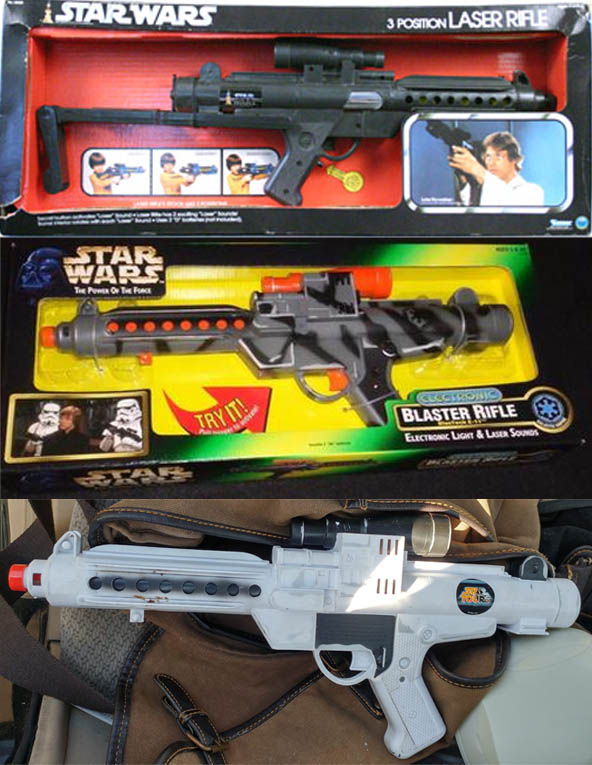 If I remember my blaster prop history correctly, these were originally produced by Kenner back in the Original Trilogy times as the 3-1 Laser Rifle ( 1) a blaster 2 )fold out butt stock 3) forward grip, part of that folding stock). When the trilogy was re-released again when I was a youngling in the 90’s Hasbro re-released it without the stock. I had one. It was White. They’ve re-released it in a myriad of colors/paint schemes since then. If I’m not mistaken the last place you could get them was at the Star Tours Launch Bay at Disney parks before they started removing toy guns from the parks. These were just as white as the original with a Star Tours paper sticker on the body (I found one of these at a swapmeet for $5)
You can find these all over eBay, garage sales, swap meets. And are probably the most common blaster costumers carry around. There is a pretty easy to install resin kit (made by Doopy Doos) that makes the gun look better, but some of the proportions of the physical toy are a little off still.
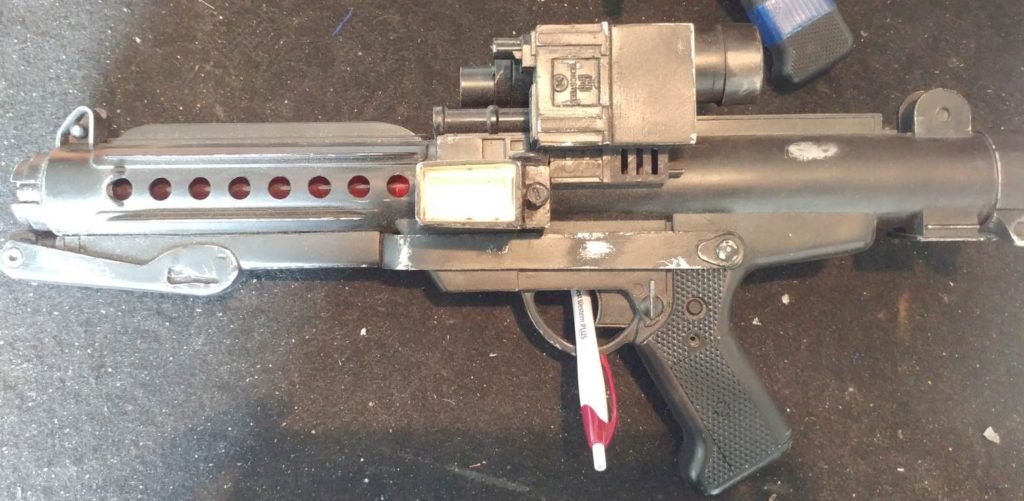
What can I expect from this tutorial/build?
I personally have done 3 builds with this blaster. All with varying results:
The Basic Model
This was the quickest and simplest variant I’ve done.
- Holes on barrel drilled out
- The screw holes on the right side have been filled with Bondo and sanded flat (
- The Hengstler counter has pieces of plastic added to it (just to give it a little more detail)
- A couple extra modifications to the magazine well (totally not necessary for the basic model
- And for paint, a Satin Black spray, some brass drybrushing on the scope and the shell ejector painted silver.
Real easy to do, you just need to sand most of that orange paint off (it does weird things to spray paint)
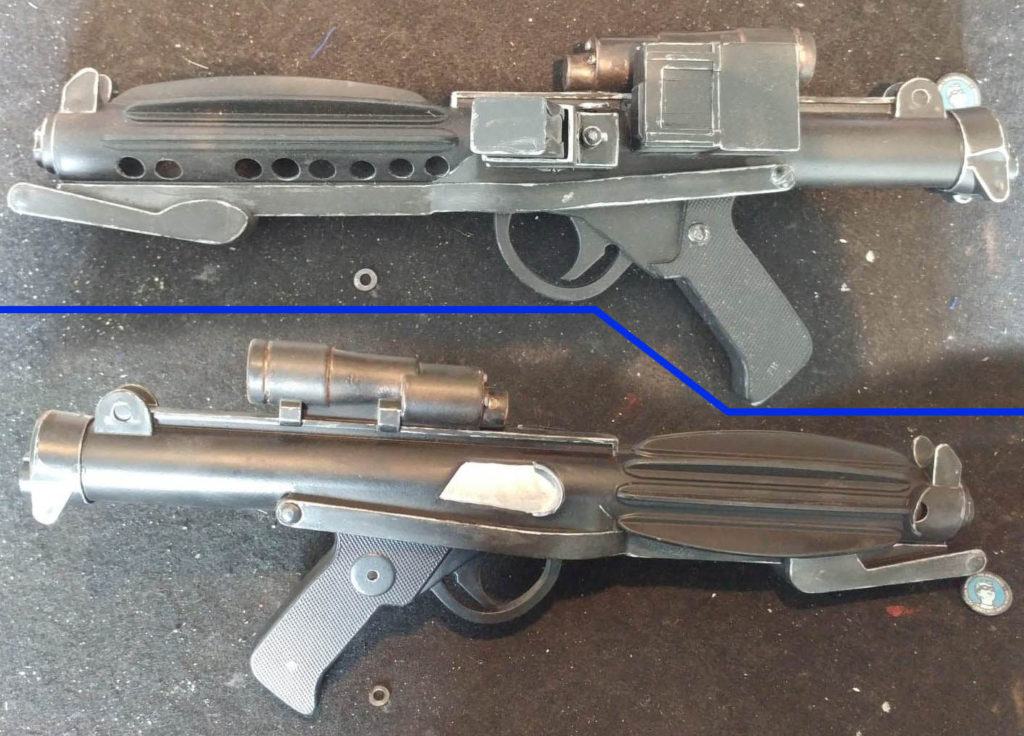
Slightly Better Model
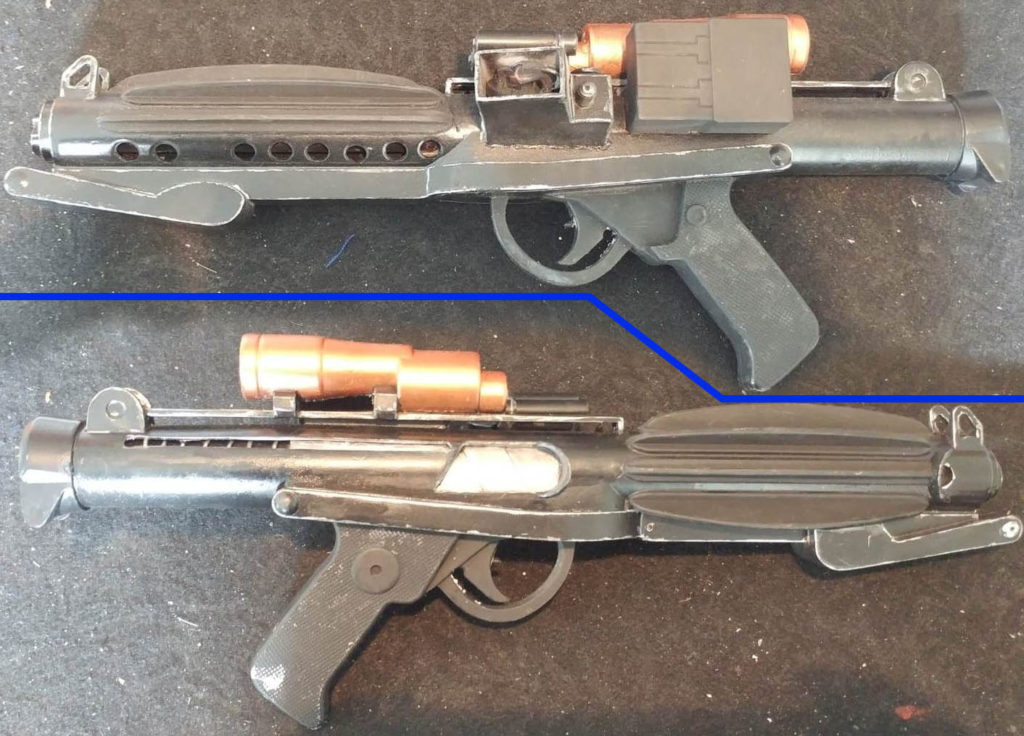
Top image:
- Forward Iron sites drilled out
- Holes on barrel drilled out
- Plastic under ‘scope rail’ removed
- Plastic between scope and rail removed
- Hot glue around magwell added for ‘welded’ look
- Magazine removed, new one made (then lost) and greeblies added
- Power Cells & mount added to top of magwell (some plastic and two AAA batteries)
Bottom image:
- Screw holes covered and sanded flat
- Ejection port cut out and evenly cut
- Bolt charging slot cut out
- ‘bolt’ added using plastic sheet painted silver
- spring added (12gauge wire electrical wire, a wire coat hanger could work here too)
Painting:
Satin Black for body
Flat Black for the T-Tracks
Bronze for scope
Silver for the ‘bolt’
Even Better Than the Last Model
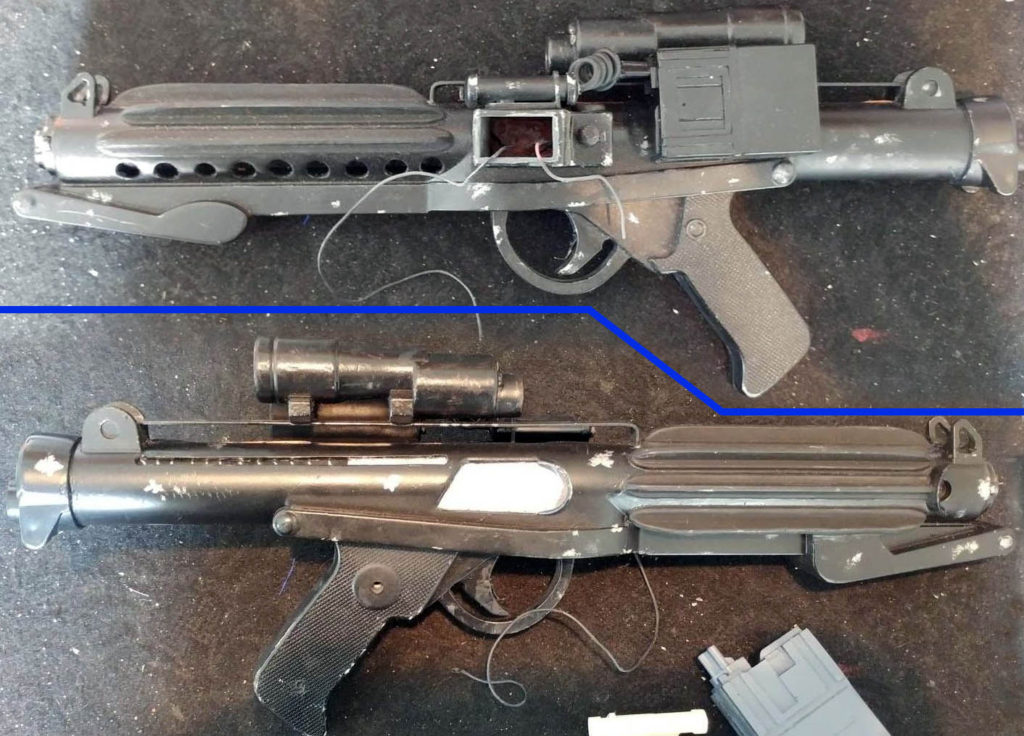
This here is my favorite variation I have done. A lot of work went into this one, but it definitely looks the best of the three. Differences from the previous version are highlighted in red.
Top image:
- Interior filled with clay to give it weight
- T-Tracks flattened
- Forward Iron sites drilled out
- Entire ‘scope rail’ removed
- Metal rail bent into correct shape and added in place of plastic one
- Plastic between scope and rail removed
- Hot glue around magwell added for ‘welded’ look
- Magazine removed, new one made (then lost) and greeblies added
- Power Cells & mount added to top of magwell (some plastic and two AAA batteries)
- Wired power cells to Hengstler added
- Appropriate sized screw heads inserted into scope front
- Appropriate sized hex screw heads added to front of gun (hard to see)
Bottom image:
- Screw holes covered and sanded flat
- Ejection port cut out and evenly cut
- Bolt charging slot cut out
- plastic sheet used to cover entire hole (charging slot/ejection port) ‘bolt’ and ‘spring’ painted on.
Painting:
Satin Black for body
Flat Black for TTracks
Bronze for scope then painted Satin black
Silver for ‘bolt’
How do these compare to the ‘real thing’?
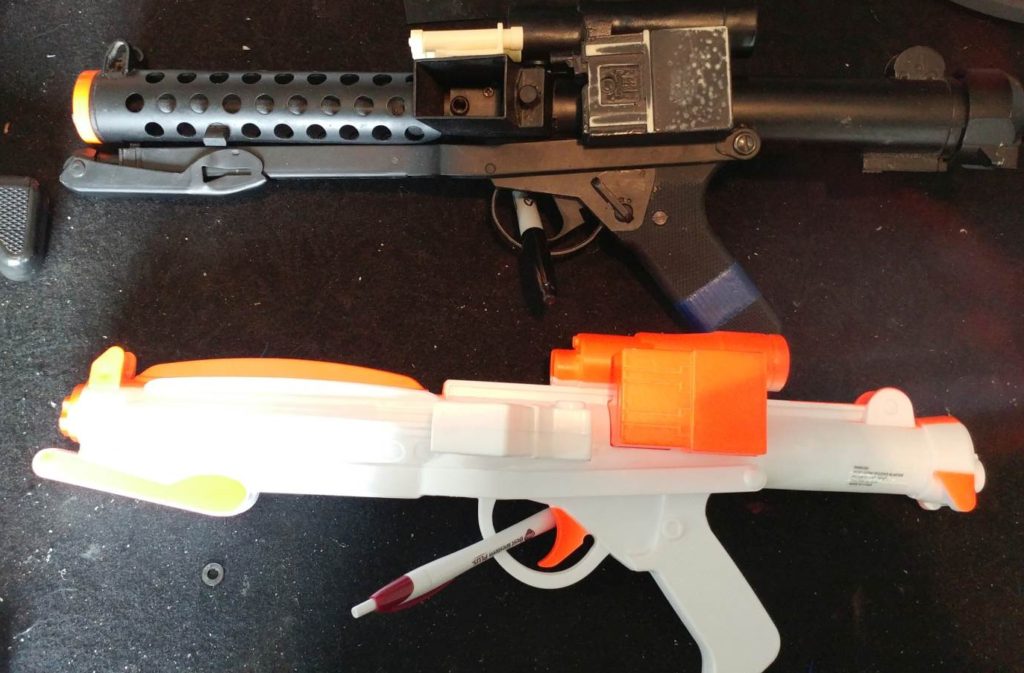
Well, I don’t got the real thing. What I do got is an Airsoft replica of a Sterling SMG and a handful of resin and 3D printed parts (sans the T-Tracks). Below is the comparison of the Airsoft Replica and the Rubies Blaster:
It’s pretty dang close and for less than $15USD its a great addition to a collection/costume/display piece.
Over the next week, I will be posting a daily build tutorial up on this site that you can follow. Each day the blaster will get more and more ‘screen accurate’.
This is a pretty simple conversion and assuming you have access to some basic power tools or a craft store. You too can have a sweet piece of Imperial Military Hardware!
If you would rather see some great video tutorials, I can’t suggest enough HappyTroopers tutorial on Youtube.
Got any questions on this build? Leave a comment below or send me an email at [email protected] or hit me up on twitter @HothPod

