San Diego Comic-Con started a week ago. That’s crazy to me. already a week has passed since I drove down to (the formally Qualcomm) Stadium hoped on a trolley and was part of the one of the largest gatherings of pop culture in the world. Also, if my records are correct, it’s been exactly a week since I said would post this.
I got busy with Comic-Con Stuff. Deal with it.
Click here for Part 1 of this build.
When we last left off, I had finally got most of my Officer Tunic made. Just a few more ‘easy’ stitches and it was complete. Roughly two weeks of work just on the tunic. So how much time did that leave me to make the other costume? About a week. 3 and 1/4 days considering all I got done one the weekend before was cutting the fabric. The vast majority of this costume was made the week of Comic Con. And for a rush job, I think it came out pretty well. Do to the last minute nature of this build, I didn’t really take that many pictures of the progress.
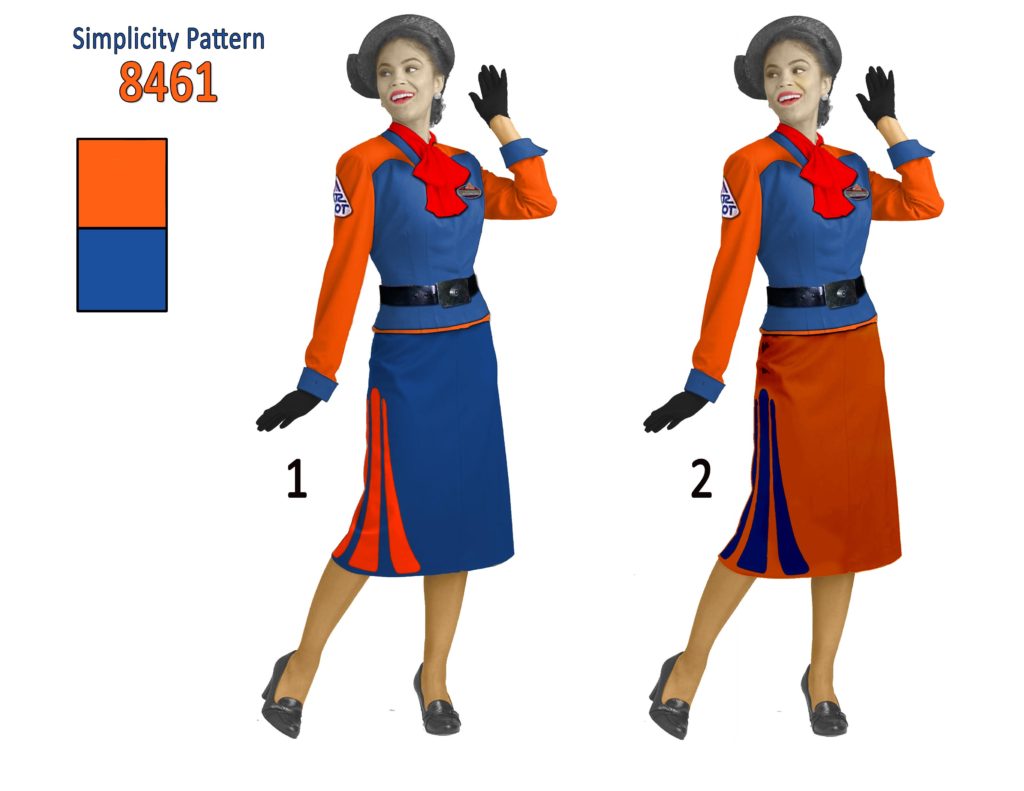 As a quick recap, the above image is the ‘prototype’ for what I wanted to do. We went with the Variant 1 as my friend is not the biggest fan of orange. So, we went with the design with the littlest amount of orange. And again, less than a week to do this one.
“Parts” List:
-
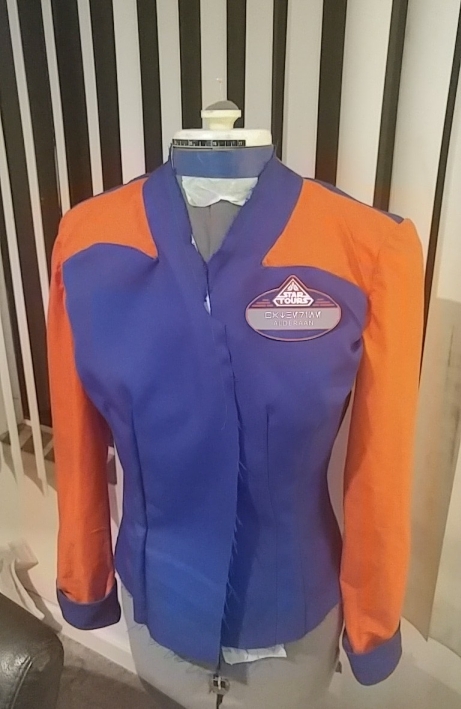
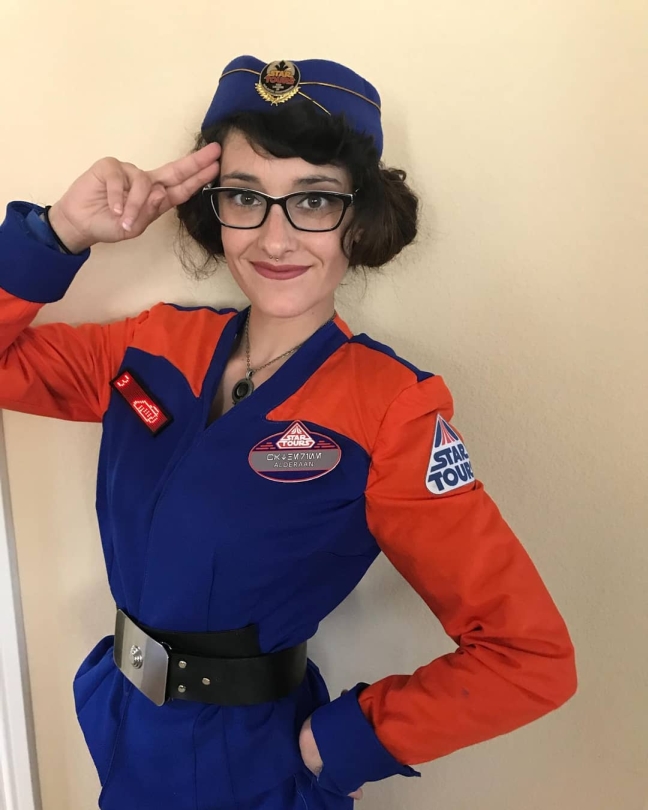
Blue Blouse w/ orange sleeves and Blue Cuffs (the image has an orange accent along the lower edge. That didn’t happen).
- Blue Skirt w/ orange Star Tour logo on right side of skirt (logo part didn’t happen either, I’ll go over that below)
- Imperial Officer belt/buckle. I reused the one I use with my Veers build. This got cut up.
- Scarf of an indeterminate color (this didn’t get done either, yay last minute costuming)
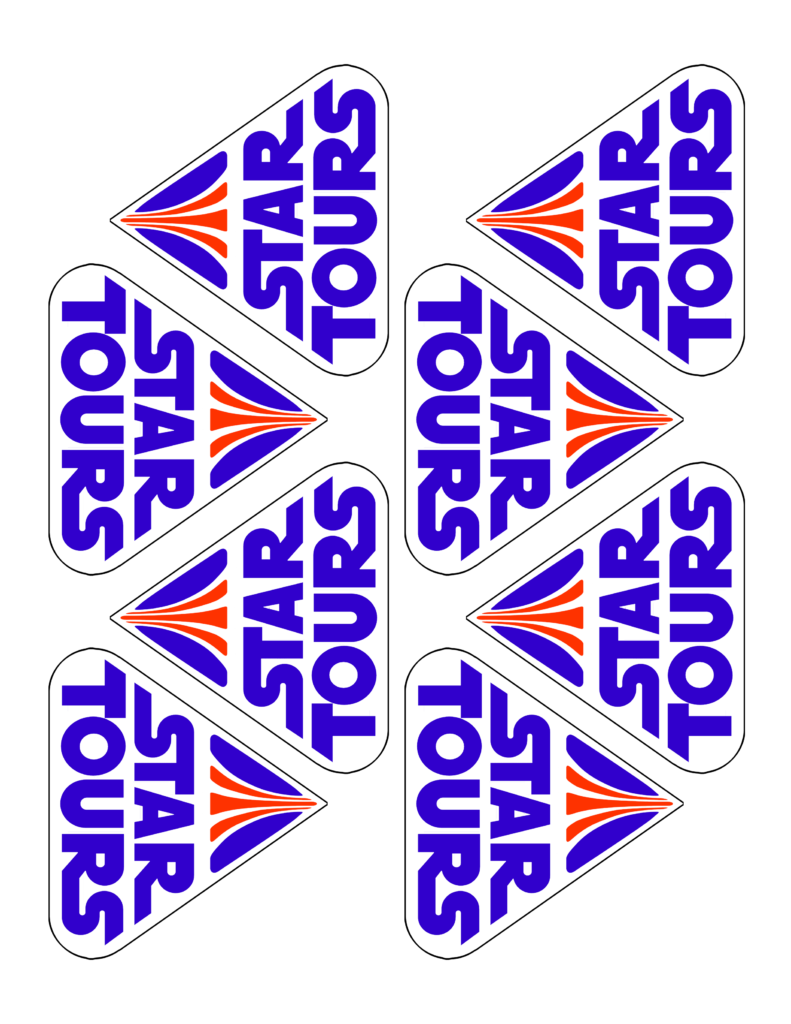
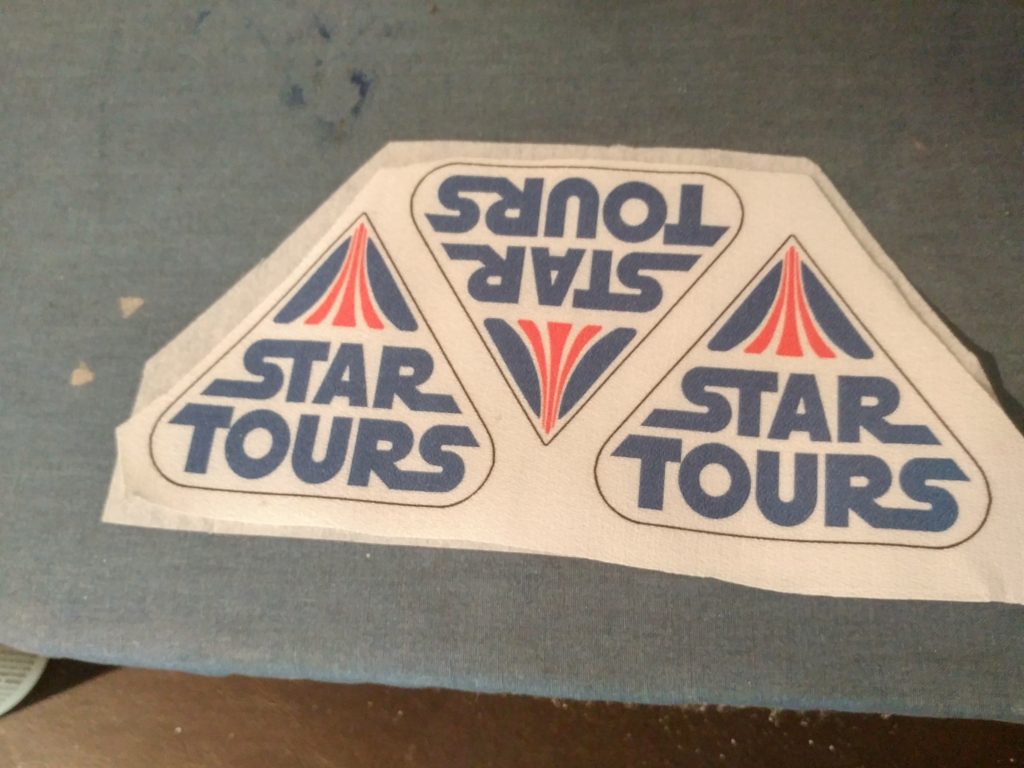
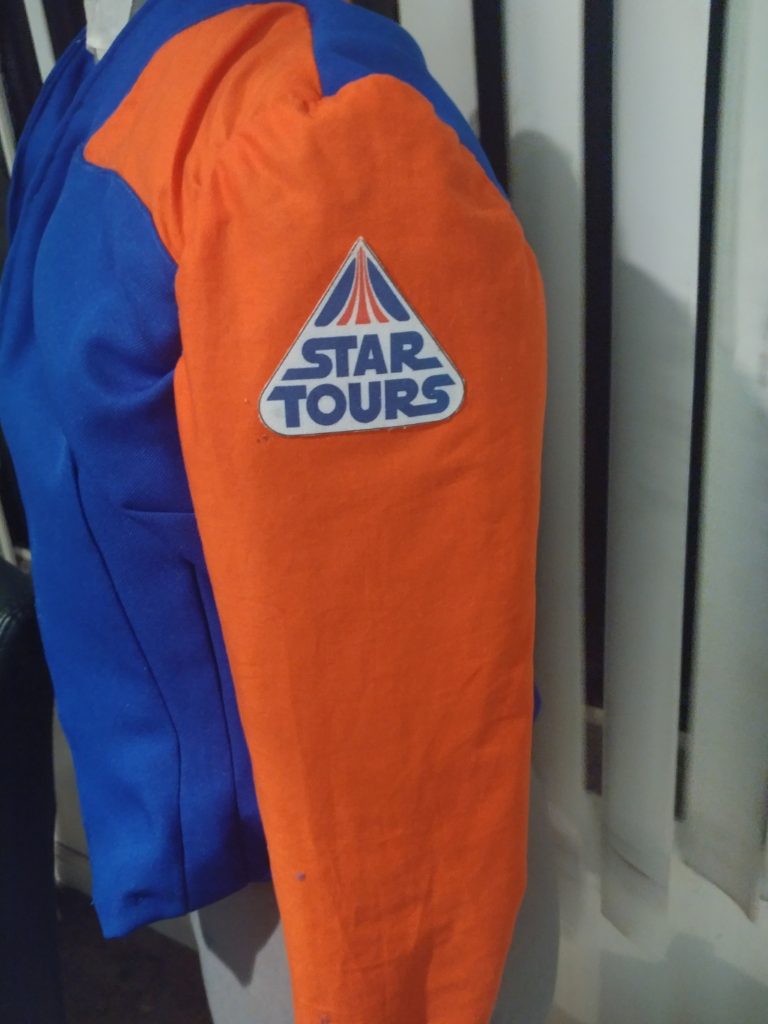
- Star Tours Patches on each sleeve
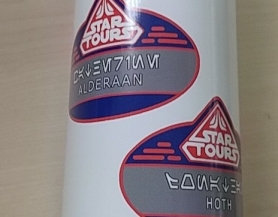
- Star Tours custom name tag from Disney parks. This and the above listed patches had to be custom made.
- Felt pillbox hat similar to 1960’s-ish flight attendant
Fri. July 13th:
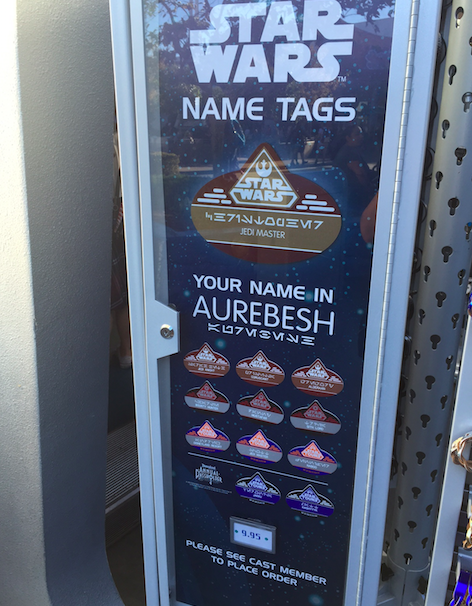
First thing I did was try to get a hold of the Disney parks Star Tours custom engraved name tag. These don’t exist in the parks anymore. They have sequel trilogy themed ones that don’t say Star Tours, so useless for my goals. I tried to order a set the week before I started this outfit from YourWdWstore but, after a week of no contact, I called and found out that they forgot to label that particular badge as sold out. I’m pretty sure they never had any in stock and just sent someone into Disney World to get them when they are ordered. So I had two options, which I will get into a little further down.

We started the weekend with a trip to my favorite discount fabric store in Anahiem, M&L Fabric. We needed to get a blue and orange that matched the fabric I used on the tunic. We found a blue that was just slightly lighter than mine and an orange that was… completely wrong. The scrap piece I brought up was close to the fabric we got in daylight, but under artificial light (lamps) it was WAY off. So the next day we searched Joanns and Wal-Marts for a matching fabric. We never found a perfect match but we got the color close enough eventually.
Sat. July 14th
Since I was spending the weekend in Orange County to work on this with my friend, and she has a normal job, the day after the fabric acquisition journey I spent looking for those darn badges.

I ended up at my favorite nerd swap meet Frank & Son in the City of Industry. It’s like all the toy/comic sellers at Comic Con in one, open year-round, warehouse. The few times I’ve been there I had noticed that they had a few Disney Pin sellers, so I was hoping I might find a used Star Tours name tag at one of these…but I didn’t. The rest of the day (until my friend got off work), I spent at the Cerritos Public library.

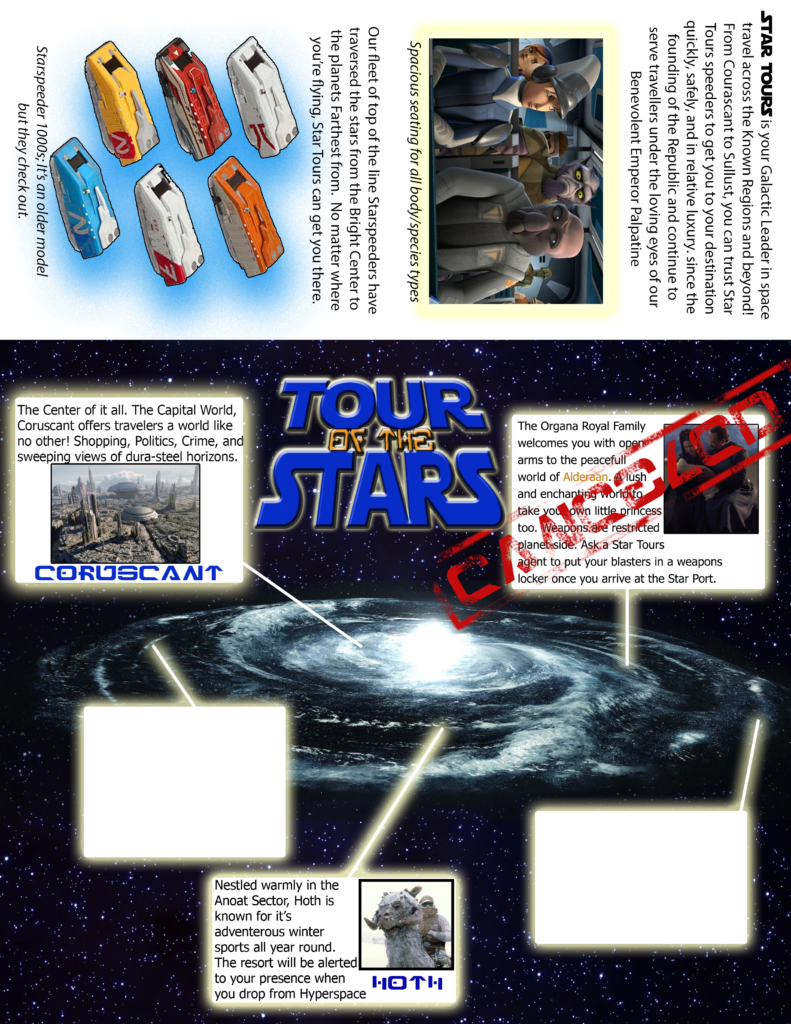
This library looks like a space ship and has a t-rex skellington in it. Also air conditioning and wi-fi. Which is important if you’re going to spend an extended amount of time doing nothing. While here I worked on my Name Tag work around, the Star Tours patches, as well as a brochure for Star Tours to hand out.
When we met up again, we somehow managed to cut out all the sewing pattern pieces and fabric and drink a bottle of Absinthe. I headed for home the next morning with very little actually sewn (none, actually, none at all). With all the pieces ready to go, it wouldn’t take too long to get everything put together, or so I thought.
Sun. July 15th
I didn’t get home until the evening as I decided to visit my cousin while I was in Orange County. So I didn’t get much done.
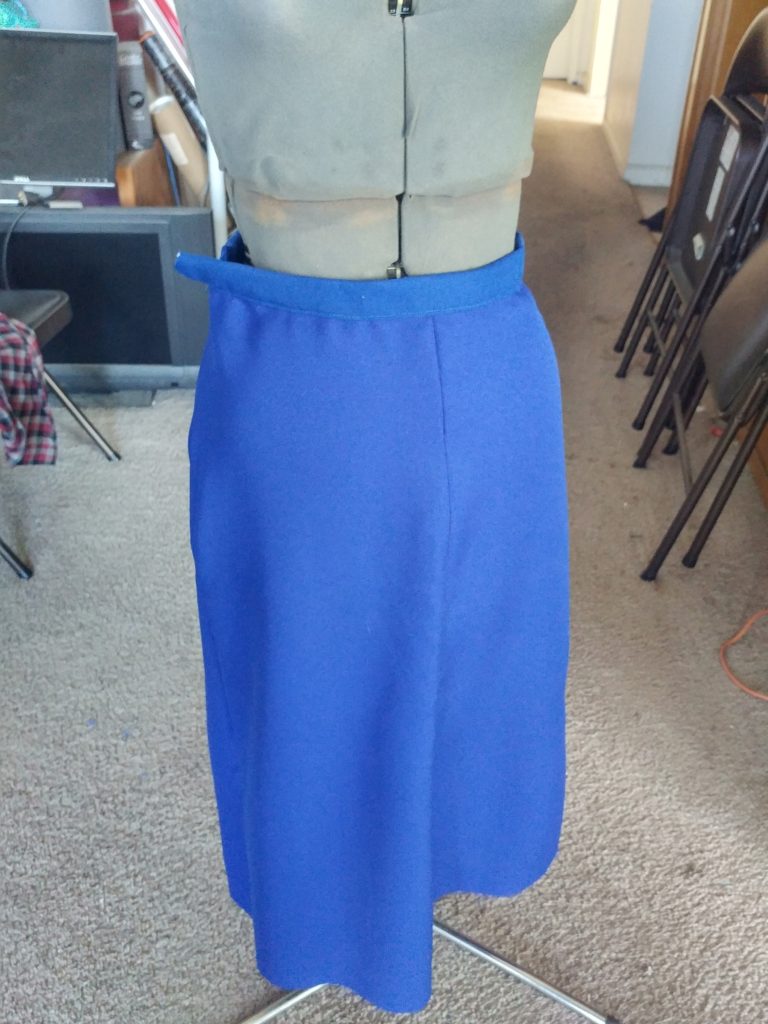
I started with the easiest part, the skirt. Four rectangles sewn together with an Invisible Zipper. Really simple to do. I didn’t do the lower hem as I wanted to wait until it could be test fit. I also didn’t add any closures for the same reason. Luckily the dress form I own is her size so I was at least able to get it everything close to the sizes they needed to be.
I also sewed the larger pieces of the blouse together. I also ordered an adorable blue felt pillbox hat and had that thing next day delivered. I decided to order one because I have no idea how to make one ^_^.
Mon. July 16th
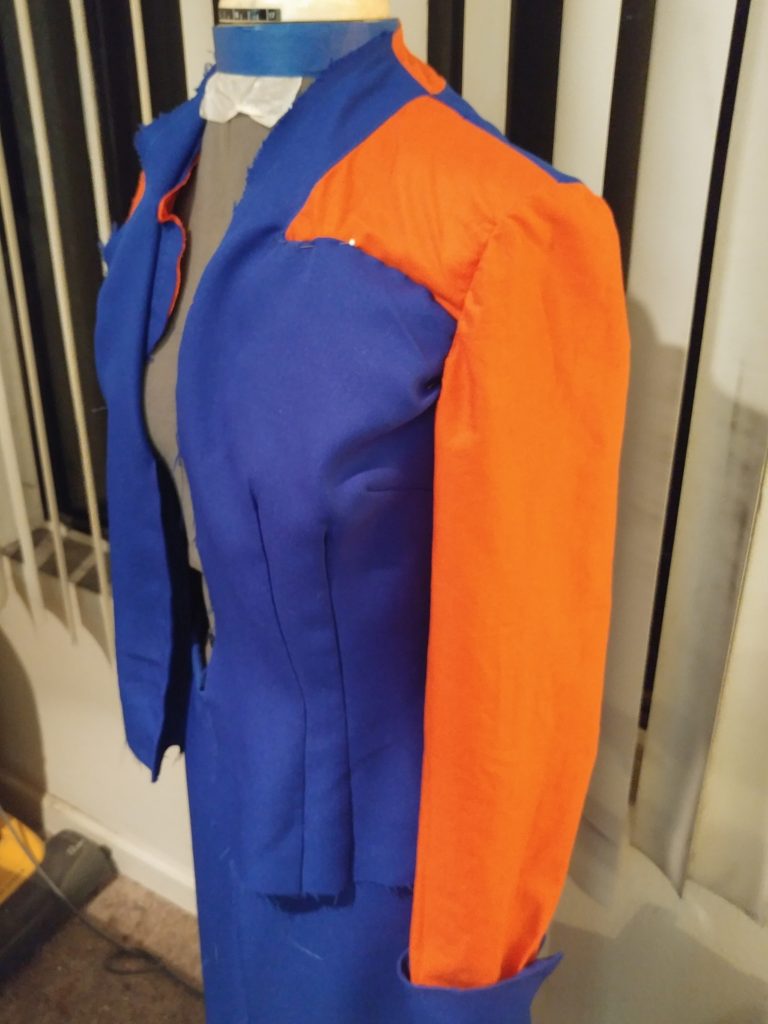
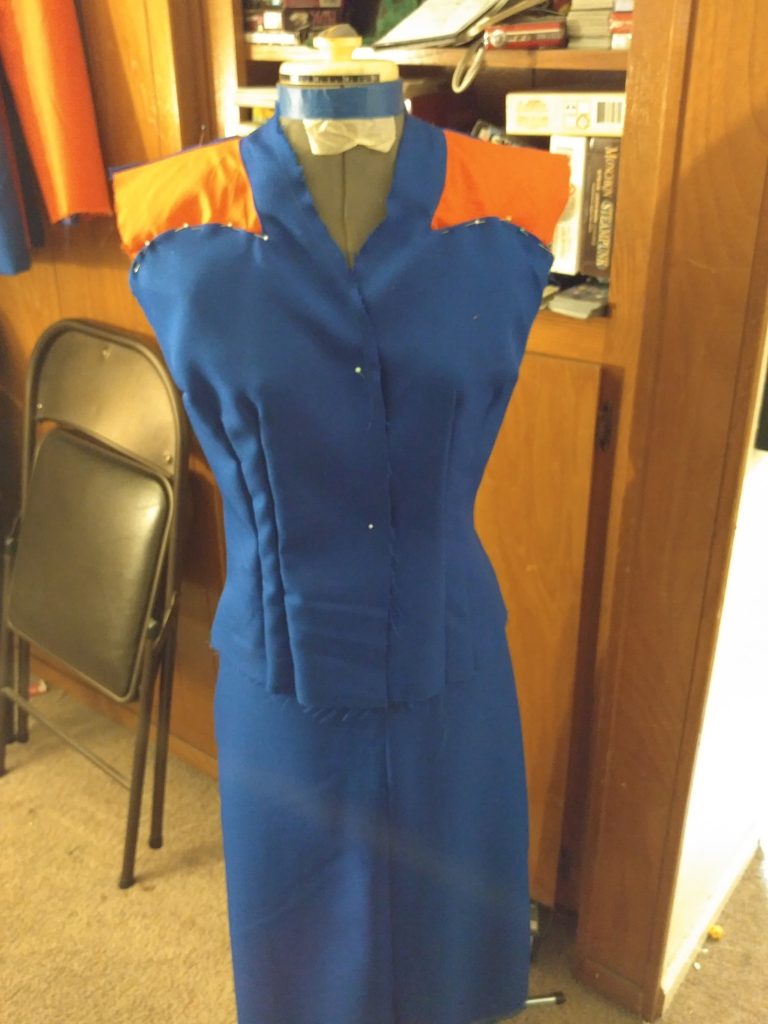
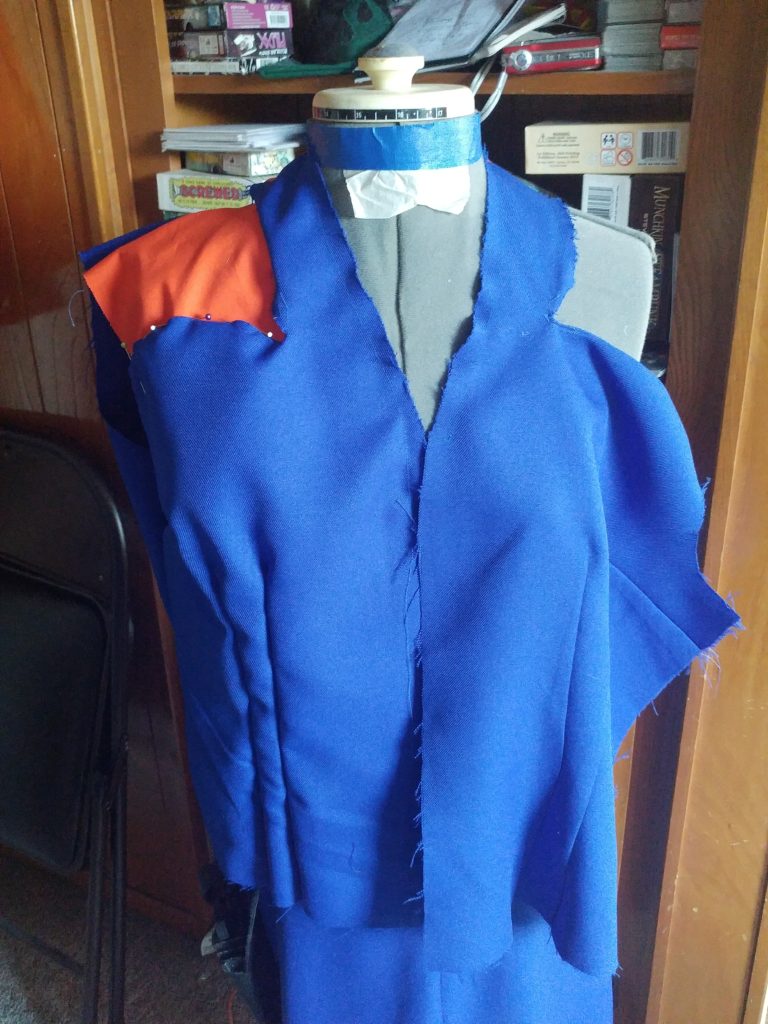
Monday (2 days before Con) I spent on the blouse. Do you see the orange section in the pictures above? Those are ‘pockets’. The instructions made it seam like they were pockets for putting the shoulder pads into. When in reality they are chest pockets that are then sewn shut. These things caused me many many headaches until I figured out what their deal was. Also, WHY INSTRUCT ME TO MAKE POCKETS THAT NEED TO BE SEWN SHUT!?! It wasn’t like they could be opened later and used. If they opening aren’t sewn shut the whole blouse lays weird and those pockets (the blue round bits) open fully. It still angers me just thinking of it. Around 2am I went to bed, still angry.
Tue. July 17th
After work, I made a stop at Staples to get the brochures printed ( which you can download here: STBrochure / STBrochureoutside) and got to work on the sleeves for the blouse. Before they got attached I made the blue cuffs and sewed them on. Now on to the sleeves.
I
Hate
Sleeves.
I thought the 8+ darts in the blouse I had to make were annoying. I can never get them right. But, Sleeves man. Nah. Especially since I had to do some modifications to the seams on the blouse to get those dang pockets aligned in some way that makes sense. They got on eventually with a whole bunch of hand stitching around the pocket seam. Did I mention I hated those pockets AND the sleeves?
The hat had come earlier in the day and luck would have it, it was nearly identical blue to the costume. I slapped on a Star Tours button and called it a night.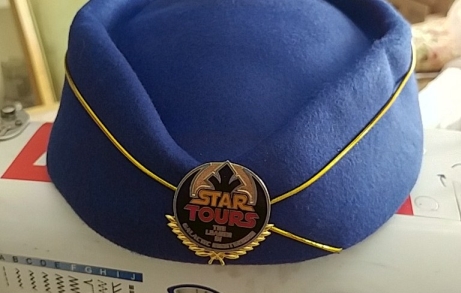
Wed. July 17th
One more day until Comic Con…I’m cutting it pretty close here…
I got a hold of my normal printing guy (TrooperBay) to make sure his storefront would be open. Once there I got sticker versions of the Star Tours badges printed as well as some cloth Star Tours patches. I also had planned to have the orange bit of the Star Tours logo printed directly on the back of my tunic and the side of the skirt. Unfortunately, TrooperBay’s print-on-fabric machine had run out of white ink which is needed as a base layer on dark fabric. Oh well. The patches had some lightweight fusible interfacing attached to the back to give them some rigidity. The original plan was to sew a blue edging like there were embroider patches. However, the fabric I used would shred when the sewing machine needle would start working on it.
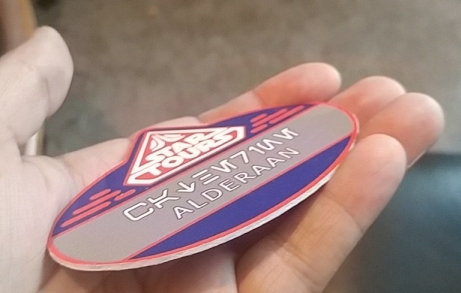
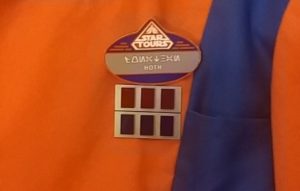 The badges were made from a thick scrap plastic I had lying around. The stickers were then applied to the basic shape was cut out. All they needed was a pin fastener that was glued on to the back. Side note; I was stopped by an Imagineer at Con that pointed out that my badges have capital letters. Which upset me, because I purposefully downloaded a font that didn’t have them (it just the regular character, just reversed). I still needed to make the lining and attach it to the blouse…but it was about 3am on Thursday morning and we weren’t wearing these until Saturday, so I still had day more. Or at least, one more late night.
Thurs. July 18th
First day of Con! I checked out the Clone Wars panel (woot), bought some enamel pins up at the Coin-Op bar’s offsite Pin and Patch pop-up, and then headed over to the Library to check out the Black Series Rebels panel. But, who cares about that. Back to costuming!
Do to the time constraints I really don’t have any progress pictures of most of what I on this night. But I did get the lining done and got the patches attached. With Glue. Classic Fabric glue. And because I have no more pictures of the build, let’s skip to Saturday at the Con.
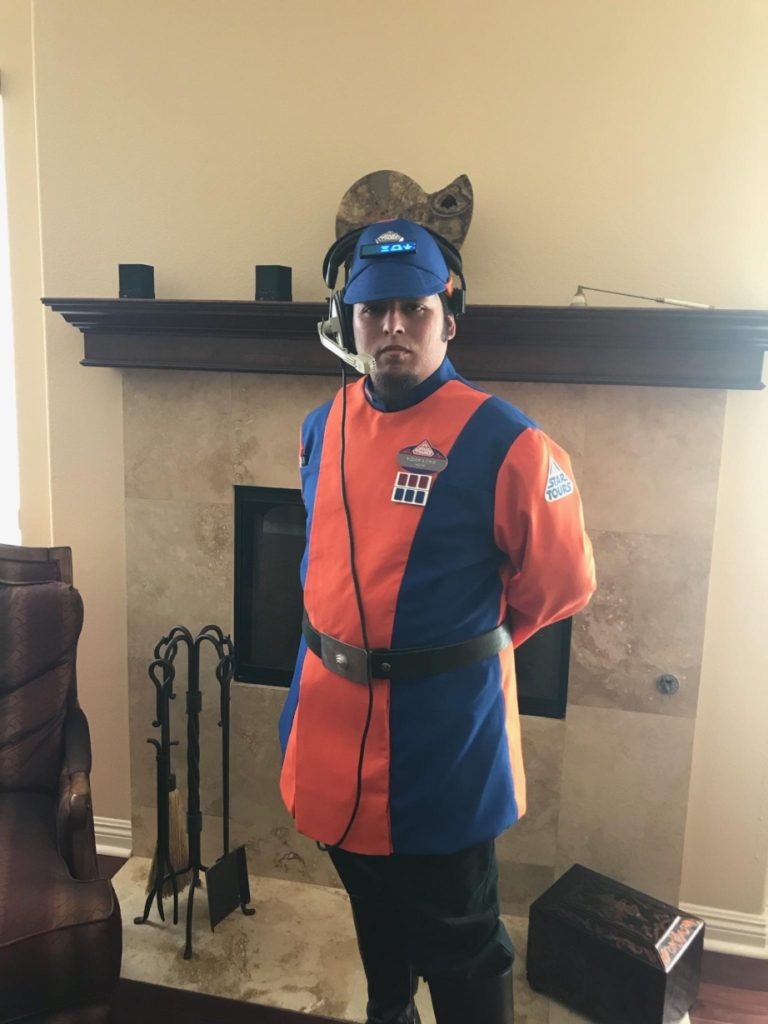
Oh and I made a Imperial officer hat in the same color scheme. Pictures of that below.
To finish off her costume. I took my old Imperial Officer belt and cut, like, 2 feet off of it so it would fit her. I then attached one of the LED name tags opposite of the Star Tours Name badge.
To finish mine. I attached my Commander Rank Insignia and Code Cylinder. Instead of the Imperial Code disk on the hat, I used a Star Tours Disney pin (like I did for her hat), and put the Aurebesh scrolling name tag on my hat, ‘cuz why not? To tie it all together I ‘stole’ a set of TV studio headsets from my work because they were sufficiently 70’s enough. I borrowed Ians officer belt (as I had cut mine up earlier for the other outfit), but I did end up replacing it with an Anovos one I got at the Con a little later in the day.
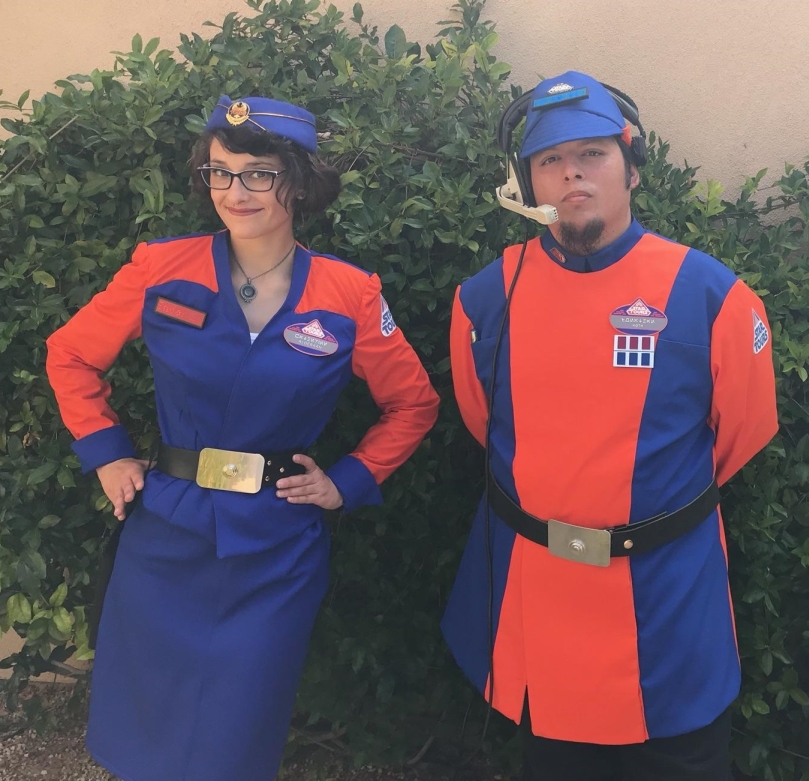
And that’s it! Star Tours Flight Crew for San Diego Comic Con 2018. The best compliments we got were “How did you get Cast Member (Disney Employee) uniforms?”. They were always surprised when I said they were hand made. And my friend was arrested by a few of our Boys in White for being from Alderaan (at least on her badge).
Now on to the next project: Cleaning up the mess.
-jon, in the Edit Bay
What sort of madness have you made for events? Let us know!
Comment below or send us an email at [email protected] or message us on Twitter @HothPod!


One comment
Comments are closed.